Thursday, December 26, 2013

Merry Christmas & Happy New Year 2014!

I would like to take this opportunities to wish all my blog readers Merry Christmas & Happy New Year. Stay Happy & Healthy in this coming new year -2014 ! I am very thankful that you have been enjoying reading my blog.

I will also continue my journey to be a better cooking/baking mummy to create wonder"food" memory for my kid. In the eyes of all kids, their mummies are great cooks. All food are made with loves.

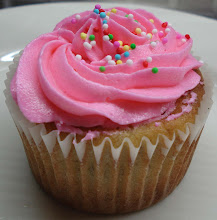
p/s Bake some little cupcakes to celebrate this Christmas. My kid enjoy decorating it.

Monday, December 2, 2013

Spicy Stir Fried Sambal Prawn Malaysia Style

Most Malaysian who love spicy food & seafood will enjoy this cuisine- "Sambal Udang". "Sambal Udang" means chili sauces + prawns = perfect combination. It goes really well with rice. My sister can eat two big bowls of rice when I cook this. This is a "short-cut" method by using the spicy seafood sauces that I have bought from the mushroom farm in Tanjung Sepat.  You can buy any ready made Sambal sauces for seafood from the store. And I will also attached a simple Sambal sauces recipes that you can make from scratch. Ta-da.......................looks delicious?


The secret sauces:


Super Fast Stir Fried Sambal Prawn for 2 servings:
Ingredients:
350g prawns (washed, cleaned, peeled)
2 cloves of garlic sliced
1 big red onion sliced
2 tbsp of sambal seafood sauces
1 tbsp of vegetable oil
1/4 cup of water
Decorations: sliced chili (optional)

Super Fast Method:
1) Heat oil to brown garlic with the sambal seafood sauces, let it simmer for a while about 1 min & you can smell the spiciness in the air.
2)In the prawns & sliced red onion, stir fry for 1 mins, then add in 1/4 cup of water let it simmer with high heat for 2 mins with lid on. Then, sauteed it for a while until the water is fairly dry. Prawn cooked very quickly.


Alternatively, you can make your own sauces from scratch.

Homemade sambal seafood sauces (Malaysia style) recipes:
Blend the below in blender with some water (minimal)
20ea of dried chili (cut the dried chili by using a scissor & pre-soak a while will help it to blend nicer)
10ea shallots (cleaned)
2 cloves garlic
1 knob of ginger

3 tbsp of vegetable oil
1 tsp of sugar
Pinch of salt

Method:
1)Heat the oil, pour in the blended chili paste in the oil let it simmer for a while with medium small heat. You can see the chili paste being heated in the oil. Keep stirring so that it will not burn. Then, add the sugar in with a pinch of salt.
2) You can add the prawn, red onion & water to let it simmer for a while to become fairly dry.

Tips: You can also add 20ea of petai in this recipes. It taste great too.

Saturday, November 23, 2013

Stir Fry French Bean with Dried Shrimp - Asian Chinese Style


Today we are going to cook this simple "Stir Fry French Bean with Dried Shrimp". All material are easily available in the Asia market. This is a very appetizing recipes,  it goes well with rice.
What are these? These were dried shrimp. In Asia these dried shrimp are very common. By looking at the pictures, you can already tell the different. We bought the really fresh dried shrimp from Tanjung Sepetang, it is the highest quality & not too salty. Heard that these dried shrimp was imported to South Korea to make kimchi too. Don't forget to buy the dried shrimp from the local fisherman.
Check out my trip to Tanjung Sepetang:
http://fabulouscake.blogspot.com/search?q=kuala+sepetang

In this recipes, you will need the mushroom sauces, I find it quite handy to use pre-prepared minced mushroom sauce for saute. This is optional, you do not need use it if you don't have. Just replace the minced mushroom with minced meat.

Ingredients:
200-250g  french beans
3 cloves of garlic, sliced
1-2 tbsp of dried shrimp
1-2 tbsp of the minced mushroom sauces or replaced this with 50g of minced meat
1 tbsp of soy sauces
1 -2 chili padi, sliced finely (optional, if you like spicy)
Approx 1/4 cup of water
1tbsp of vegetable oil for saute

Method:
1) Wash & cut the french beans into 1.5 inches length.
2) Heat wok with oil, saute the garlic & dried shrimp with medium heat for 1 min.
3) Add in the minced mushroom sauces/ minced meat & chili padi , continue to stir fry for another 1 min.
4)Add in the rest- french beans, water, soy sauces. Let it simmers with medium high heat until it is fairly dry.
5)Salt is unnecessary because the dried shrimp is actually quite salty. You can add in a little bit salt if you have a heavy taste bud. 
6) To decide: pick one of the french bean out of the wok & eat. You will know.

Monday, November 18, 2013

White Radish Soup with Abalone Slices


Recently it rains a lot, I like rainy day especially when the weather is warm or on a lazy weekend. But the timing got to be right. If it rain at late afternoon at 5pm on week days, it is a pain because there will be big jam & my kid will come back late. Hubby will come back late.We will have to eat late dinner. Prefer to have my dinner no later than 7.15pm so that I can be kind to the tummy.

This is a very simple soup but comforting. It looks luxurious due to the abalone slices. While I am shopping in the Chinese herba shop, I spotted some cheap dried abalone slices on sales. You do not need to buy the whole abalone, you can get pretty good bargain buying the half abalone slices. Initially I have no intention of cooking it with the radish soup. But, the dried octopus was out of stocks. So, I use these abalone slices as replacement. The outcome was pleasing.

Ingredients (3-4 servings):
300g soup bones
2 liter of water
6ea red dates
1 whole white radish
4-5 slices of dry abalone slices (or 1ea of dried octopus which is more or less same size with my hand)
2 dried scallops

Method:
1) Must pre-prepare the dry abalone slices.
-boil a pot of water with 4 slices of gingers, 2 stalks of spring onion & 2 tbsp of rice wine & abalone slices. Let is boil for 5 mins with lid on.
-this is to remove the unpleasant smell of the dried abalone.
- off the fire & let it soak in the hot water for 4-5 hours with lid on.
- later rinse it with water, then it is only ready to use.
2)De-skin the white radish, chop into big pcs.
3)Remove the seed of the red dates. Clean with running water.
4)Clean the dried scallops with running water.
5) Wash the bones. Boil a pot of hot water & then put in the bones, let it simmer for 3-5mins. The soup will be clear & nice.
6)Put everything inside the pressure cooker.Boil for 30-40 mins with slow fire.
or
7)If you use normal pots, you may need to add another extra 800ml of water due to the evaporation. Once the water boiled, turn it to slow fire & boil it for 3-4 hours.
8) Serve warm.

Friday, November 15, 2013

Steam Tofu with Minced Meat

On a weekday dinner, I normally will prepare some really simple & fast dish. The best thing is while cooking the rice, I can steam it together inside the rice cooker. In Asia, every household has a automatic rice cooker at home, you just need to wash the rice & press the automatic button. It will cook the rice perfectly. It comes with a tray where you can insert on top of the rice bowl for steaming while the rice is cooking.

I noticed that most kids love to eat soft tofu & minced meat as it is easier to chew. Especially younger children aged between 3 to 5. Try to buy better quality meat. It really make a big different. I don't deny that quality meat is more costly. You can buy within your mean.


Ingredients for 3 servings:
180g minced meat
1 tsp of shao heng cooking wine
1/2 tsp of chicken stocks granules
1 tbsp of corn starch 
1tbsp of water
Pinch of Salt
few drops of sesame oil
Method: Mix all the ingredients above by hand until the minced meat is sticky & smooth.

Others ingredients:
1 box of soft tofu (appx 200g)
Shallots oil- cut a few pcs of shallots, sliced it, fry in any vegetables oil.
Careful. Don't burn it. Mine was slightly burned. But I still use it anyway. Grandma said not to waste.

Final Assemble Method:
1)Cut the box soft tofu into half, lay it on the plate.
2)Top the minced meat mixture on top of the tofu.
3)Steam it together on the insert on top of the rice cooker. When the rice is done cooking, your meal is ready.
or
4) Use a steamer to steam it. Put the plate in AFTER the water boiled. Let it steams for about 12-15 mins.
5) Lastly, drop 1 tbsp of the shallots oil on top of the minced meat.
Serve immediately to enjoy.


Monday, November 11, 2013

Simple Udon in Japanese Awase Miso Soup

When hunger strikes & you need FAST food to be served at you home little kitchen. I will recommend noodles soup. Super fast udon in miso soup with Japanese mushrooms, fried tofu, fish ball & some spring onion. Kids love noodles. Noodles in soup is really comforting especially on cold raining seasons.

I prefer to use fresh udon as it tastes better & cook faster , it is very springy or "Q" in Mandarin.

Ingredients for 1pax:
1 pkt of fresh Udon (200g)
Method:
Just buy any quality udon from the store & follow it cooking instructions.
Drop the udon into hot boiling water, cook for 3 mins or so & drain it.
Wash the udon with running tap water to clear the starch, drain & keep aside.
By doing this, the soup will not looks cloudy.

While you are cooking the udon, boil about 350ml of water.
Add in your favorite choice of Japanese mushroom, sliced fried tofu, fish ball or your choice of ingredients.
Once all these are cooked, go ahead & add in 1tbsp of your favorite miso & spring onions.
Slightly stir the miso & cooked udon & let it simmer for abt 30 seconds-1mins.
Serve immediately.

The success factor of this simple dish is delicious awase miso paste & good quality udon noodles.
Try to select the miso paste that has this label-"awase" on it, a type of mixed miso which taste better.

Tuesday, October 22, 2013

Baked Marble CheeseCake


I have lots of collections on books especially cook books. Sometime I will test some new recipes & write some notes on the books. Remarks will be written on the books based on my own observations. It could be very messy. Sometimes, I will put a big "X" on the recipes. But this recipes which I adopted from Su Chan "Cake Temptations & other desserts" with a little changes- deserved a big "V". It is worth keeping. To be honest, the author recipes is very practical. You should be able to make the same cakes you see from the pictures.Appreciated that.
Cheesecake Texture is very smooth
I did not bake in bain-marie, so the surface of the cake crack a little. But it doesn't affect the taste of the cheese cake.Still smooth & yummy.

Ingredients
150g Marie/Digestive biscuits crumbs
75g melted butter
30g Melted Dark Chocolate ( I use 70% Cocoa)

Method for the base, mix all the biscuits crumbs & butter in a bowl & press to a 9 inches round pan. Freeze the base in the freezer.
Reserve the Dark Chocolate to make the marble swirls.

Fillings:
450g cream cheese
140g castor sugar
6 egg yolks
2 tbsp lemon juices
1 tsp lemon zest ( I just use up the 1 lemon skin to "zest" it)
1 tsp vanilla extra (I prefer to use extra instead of essence)
50g All purpoe flour
150ml whipping cream,whipped & keep it cool, otherwise, it will deflated.

Whisked until soft peak:
6 Egg whites
1tbsp sugar

Method:
1) Beat cream cheese + sugar in a bowl & add in yolk one by one.
2) Add in lemon juice, zest, vanilla extract & flour. Mix well & add in the whipped whipping cream.
3)Whisk egg white + sugar until soft peak & fold into the cheese mixture above (no.2)
4)Pour 1/3 of the filling into the prepared tin & drizzle with 1tbsp of melted chocolate. Repeat twice until you finish using the melted chocolate.
5)Stir mixture with chop sticks to form the marble effect.
6) Bake straight in the preheated oven 150C  for 45 min or till set. You will get the crack surface cheese cake.
or
6) Bake in bain-marie in the preheated oven 150C for 45 mins or till set. Each oven behave differently. Pls observe & adjust accordingly.
7) Remove from oven & let cool.
8) Refrgerate over nite & it taste better.
9) Serve chilled. I enjoyed with my favorite coffee.

* See how to on bain-marie/double boiler,
http://www.thekitchn.com/technique-how-to-make-and-use-70190

Sunday, October 20, 2013

Christmas Cookies - Ina Garten

These cookies are seriously addicted. Carol, Amanda, Dave, Ben & Henry just love these cookies. They are especially suitable as gift for special occasions like Christmas & New Year celebrations. It really gives you the Christmas feel or celebration mood. Today is the 20th Oct, you can try to bake these cookies for the coming Christmas (in two months time).Personally, I love Christmas & looking forward to it.

Conversations:
Amanda told me: Come, you must try these cookies before it runs out. I forgot where I bought it.
Amanda asked Henry: Son, you remember where we bought it?
Henry answer: Mom, it is from the neighbor bakery.
By then Amanda only realized it was actually from me.

Please visit this link for the original recipes:
http://www.foodnetwork.com/recipes/ina-garten/fruitcake-cookies-recipe/index.html

Saturday, October 19, 2013

Delicious Cranberry, Raisin, Blueberry, Chocolate Chips Muffin

Fresh Blueberry Muffins
Muffins are good for breakfast or tea break. It is not as sweet as cupcakes & the texture is not as fine as a cake. The texture is more coarse compared to cupcakes.  It is very versatile & you can use it to make any version of muffins depends on your favorite choices- Cranberry, Raisin, Chocolate Chips or Blueberry.

This is a super easy recipes which is very suitable for any beginner in baking. Even though I love to bake & can create some complicated pastry but I still love to bake simple stuffs. The only reason - fast! On the other hand, I do enjoy complicated baking, it makes you feel good that you can make something at par with those professional baker. Baking is very therapeutic too. Even though I need to do a lot of clean up after a major baking session, it is still very satisfying. Yeah...these muffins are very satisfying too.

Here it is:
To make 5 muffins, You will need the below:

50g Butter
70g Sugar
1 Egg
100g All Purpose flour/ Low protein flour
1tsp Baking Powder
A pinch of Salt
60ml Milk
75g Blueberry, Raisin, Cranberry or Chocolate Chips

Method:
1)Beat butter & sugar until fluffy & color turn pale.
2)Add in eggs & mix thoroughly.
3)Add in the premix of dry ingredients:  flour + baking powder + salt.
4)Alternate the flour mixture with milk.
5)Lastly, add in your favorite choice of Blueberry, Raisin, Cranberry or Chocolate Chips.
6)Bake for 170'C in a preheated oven.

*Tips- for all baking, you need to preheat the oven until the specified temperature. If you did not preheat it, the baked goods will not turn out right.

Cranberry Muffins
This recipes is good as it is not too heavy. In fact I like the right texture of these muffins. You can see it from the below pic.
Lovely Cranberry Muffins Texture


Saturday, July 27, 2013

Delicious Homemade Pizza for 2

This is a very simple recipes yet delicious. Pizza is a comfort food. To me, it is just like an open toast sandwich. If you fold the pizza half & seal it, it became a Calzone. It just like a big curry puff. The only different is the fillings inside.

Pizza topping is very personal. Just be creative with the topping ingrediants, I even put tomato sauce on top with sambal ikan bilis sauces, red onion & some prawns. Sound very South East Asia right? 

My toppings: bacon, sausages, red/yellow bell pepper & onion. Use any store bought pizza sauces for convenient. Usually I will buy big tall bottle of tomato pizza sauces, use 2/3 for pasta & 1/3 for pizza. It keeps well in the fridge for a few days. Read the label.


Another tip- use high quality mozzarella cheese.


This is a perfect recipes for Pizza for 2 adults. It can be made into 1 big pizza or two medium thin pizza.

200g Hi Protein Bread flour
1tsp Dry yeast
2tsp Sugar
2/3 tsp Salt
140cc warm regular tap water

Method:
1) Mix yeast with water, add into the flour + sugar + salt (mix all dry ingredients 1st).
2) Knead the dough with bread machine or by hand.
- Machine  (need to work the dough for about 8 mins)
- By hand (need to work the dough for 15 mins)
3) Make the dough into a round shape. Let it rise in an air tight container or any bowl cover with a wet towel/ wrap. keep it in a warm place. It will rise to almost double the size in 30-40 mins.
4) Then, punch the dough down, you can divide into two single pizza & use a rolling pin to flatten the dough. Remember to flour the table top. Make sure the flatten dough do not stick on the table surface. Use a fork to make some hold on the flatten dough. It is best roll in on a marble table if possible. Oh yes, the reason I buy the classic marble table which is so 80s....
5) Spread the tomato sauces, then sprinkles any of the ingrediats of your choice, lastly top it with the mozeralla cheese. Let it rest for 10 mins.
6) Remember to pre-head the oven at 220'C & bake the pizza for 10-12 mins.


As usual, I never taken a baked pizza picture, this is because when the pizza is ready, we dig in too fast.


Saturday, June 29, 2013

Fried Spagetti with Spinach Japanese Style


Over the weekends especially Saturday or Sunday afternoon,  I seriously do not know what to cook. Or too lazy to cook. But we still need to eat & fill up the stomach. We just need something quick & comfort- PASTA!!

My kid says the pasta with tomato sauce ...again? =.=
Fine. Mummy cook stir fry pasta, simple ingrediants & extremely satisfying.

Simple ! Simple! Simple!

Serving for 2:
200 g dry pasta (cook as per package instructions- 1 min less than al dente)
3 slices of bacon (cut into pcs)
some minced garlic (load more if you love garlic)
2 stalk of spinash (wash & cut into 1 inch lenght)
some japanese muchroom or any fresh muchroom (optional)
1tbsp Japanese soy sauces
1tbsp sake
1tbsp mirin
olive oil
Probably half a cup of pasta water or less

Method:
1) Fry olive oil with garlic, add in the bacon & muchroom. Fry for 2 mins.
2) Add in spinach. Stir fry for 1 min,
3) Add in cooked pasta with soy sauces + sake+ mirin & some pasta water. Stir fry for 1 -2 mins. Let the sauces absord into the pasta.
4) Serve & dig in immediately.( I like this the most!)

Friday, June 28, 2013

Red Velvet Cupcakes & Frosting


To me, sometimes writing a blog is like writing a diary. Mine is a food diary. I am sharing some mistake or fun that I have learn through my "culinary" journey. I have fallen in love with kitchen because I have always believe in nurture my kid with good nutritions make them a better person - healthy & mentally. Desserts are just part of it. Every mum feel proud when their kids tell them : "My mummy is the best cook in the world!!" .Besides, I seriously need to de-stree myself in the kitchen.

I love sharing my baking goods with the neighbours, nanny & friends. Let me tell you something funny happened in this 2013 Chinese New Year.

Amanda was  telling me that she has these new year cookies taste very good & asked us to try. Then, she asked her son where did they bought the cookies because she just couldn't recall where she bought it. The son answered it was from the neighbour's bakery. She was not awared that the cookies was from me.  I handed over to her son while she is not around. I will share the recipies with you later. It is the "fruitcake cookies", which taste really good. My ex-nanny love it too. Kinda miss her also.


Today, let me share with you the RED VELVET CUPCAKES recipies.
Red velvet is a chocolate based cake with cream cheese frosting. Kids & adult love red velvet.
For the cake recipies, pls refer to my previous post:

Rich Chocolate Cake
http://fabulouscake.blogspot.com/2013/04/rich-chocolate-cake.html

Red Velvet Frosting/ Cream Cheese Frosting:

Ingrediants:
1/2 cup of salted butter
6 oz cream cheese
0.5 tsp vanilla extrat
3.5 cup of icing sugar
(Optional) 1 tsp of milk depends on your liking on the frosting consistency.
Some decorative silver balls or food colouring

Method:
1) Mix cream cheese with butter, beat until fluffy. About 4 mins on medium speed.
Do not over mix because the mixture will become grainny. Never overmix when there is cream cheese.
2) Add icing sugar (pls shift before use),beat until smooth & fluffy.
3) Add in vanilla extract. Use pure vanilla extract which taste so much superior.
4) You can separate the icing into a few bowl, add in food colour (one or two drops will do), spread the colour icing on the cupcake & decorate colour sugars.

These are gifts to friends & colleugues for special occasion, my mind tell me..."Christmas".
Haha....now is too early for Christmas.

Friday, April 19, 2013

Rich Chocolate Cake


Oh boy, it has been some time we did not update this blog. I must celebrate the "re-launch" of the blog by posting one of our favourite chocolate cake recipes. Life is busy with kids running around who need the parent’s tender loving care.


In life, we celebrates good things happened around us. We are very thankful that we met some nice people that sincerely want to help us. It is a blessing to have a nice nanny & nice neighbors. We are blessed.

This is our "Thanksgiving" chocolate cake recipes (adapted from Donna H magazine). Hope you enjoy it.

Cake:
250g butter
220g brown sugar
3 eggs
250g flour
1.5tsp baking powder
60g cocoa powder
145g sour cream/ yogurt

Icing:
250g double cream
200g dark chocolate

Method:
1) Beat butter sugar until fluffy.

2) Add in beaten eggs one by one until the mixture light & creamy.

3) Premix all the flour , baking powder & cocoa powder.
4) Sift flour mixture into the butter mixture & mix with sour cream until just combine.
5) Do not overmix.
6) Bake in a pre-heat oven 160C about 45 min- 1 hour

Icing:
1) Melt dark chocolate with double cream.
2) Let it cool at room temperature.
3) Put it into the chiller for about 30-45 mins,
4) Lightly beat the mixture.
5) Spread nicely on the cake.